Saturday, September 24, 2011

Gluten Free, Dairy Free Cinnamon No-Rolls

Home with the kids this weekend, I found myself mourning the lack of oats.  I never remember to buy these kinds of things.  (That would be why I've been out of powdered sugar for a month.)

Six cans of fire roasted tomatoes?  Of course.  Seventeen thousand pounds of dried beans?  Shelved neatly in the freezer.  But, nooo, I can never remember things like powdered sugar. 

Or oats.

Darn oats.

But, when you think about it, it really isn't about the oats.  It's not about the apples, either.  

For me...

it is all about the cinnamon.

I adore cinnamon.  Vietnamese cinnamon, to be precise.  Don't have a favorite cinnamon?  For shame.  Go to Penzey's as soon as you can and smell the little jars.  You'll be able to pick a favorite.  (One of my friends is my Penzey's Partner - her favorite is korintje cinnamon - another good one and it's readily available.  I have a jar from the supermarket here in town.)

My nine year old's love of cinnamon pretty much only extends to cinnamon rolls.  Cinnamon rolls were my Everest for the longest time and I've finally found a recipe that we love.  That said - I may have a new favorite.

Gluten-Free dough is sticky, by nature.  It's workable, don't get me wrong, and when you adjust to wetting your hands and utilizing parchment or a silpat, it's much easier.  But, it's still a pain.  Heck, it was a pain to make regular cinnamon rolls.  It's a labor of love.  I'm willing to do it... twice a year.  But, it isn't something I really enjoy doing.  

I mean, how do you think Cinnabon got so popular?  Because a good cinnamon roll is rare enough.  But even if you have an amazing recipe, you still have to do all that work - in all those steps.  

So, I set out to eliminate some of that.  Udi's has a pretty good little product that they call a cinnamon roll, but the textures not quite right.  It's more of a cinnamon muffin.  And when you're all about the cinnamon, there's a significant lack of gooey, sweet, buttery cinnamon swirl.

Let's see if we can fix that!

Gluten Free, Dairy Free, Cinnamon No-Rolls

Base layer
3 Cups Flour (as always, I use Pamela's) 
1 cup sugar
4 tsp aluminum-free baking powder
1 tsp cinnamon
Pinch of kosher salt

1 1/2 cups unsweetened nondairy milk of your choice (we like Silk coconut milk)
2 eggs
2 tsp vanilla extract
1/2 cup vegetable/canola oil
(you could technically use an equal amount of applesauce, but we're about to get butter loco)


Top layer:
1 cup of Earth Balance (or nondairy margarine or butter)
1 cup of brown sugar, packed
2TBSP flour
1 TBSP cinnamon

Optional: 1/2 cup chopped pecans or a diced green apple 
(I added the latter since my daughter doesn't care for pecans.)

You can figure this part out, right?  Mix stuff until it's dough.  Awesome.  Good job.

Spread it in a 9x13.  You can use a spatula/spoonula or just moistened, clean hands.

Make the top layer by combining the earth balance, brown sugar, flour, and cinnamon.  Drop by spoonfuls on top of your base layer, or spread.  Whatever makes you happy.

With the side of a spatula or the back of a wooden spoon, swirl spirals into the dough to give it that cinnamon roll look.  (I mean, let's be honest, you don't have to.  It's going to taste just as good.)

It will look something like this (minus the green, if you don't have apples in yours.)


Yum, right?

Preheat the oven to 350° and bake for about 40 minutes.  It will puff all the way to the top of the pan, then fall a bit as it cools.  Don't sweat it.

You can top with a cream cheese frosting (nondairy for our crew) or an easy powdered sugar glaze (just thin out some powdered sugar with a few teaspoons of "milk" and drizzle over the top)


Sorry I had to zoom in on one swirl.  I swear it's not because the corner was missing at this point.

I also swear I didn't burn my fingers on hot sugar.  Or something.


With glaze added (honestly?  Unnecessary and a tad too sweet with glaze, for my liking.  But that gooey cinnamon butter stuff you see right there at the top?  Oh yeah. You need to taste that.)

Cinnabon, who?!


Tuesday, September 20, 2011

Gluten-Free Dairy-Free Apple Crisp For You & Me

A friend of mine posted recently that she was making an apple crisp.  I, of course, couldn't keep my big mouth shut and started yapping about how I had a great recipe.  there goes the diet


So, of course, I had to make one. Let's be reasonable here.  It's what a good friend would do.  The topic also led me to wax poetic about the joys of an apple peeler/corer/slicer.  Seriously, it's a gem of a gadget. But, you can absolutely peel and cut them to your heart's content.

8-9 apples
1/2 cup granulated sugar
juice of 1 lemon
~
1 cup rolled oats*
1 cup brown sugar
1/2 tsp nutmeg
1 tsp good quality cinnamon (seriously, splurge on some vietnamese one day)
1/2 C Earth Balance (or butter)


*note: some oats can be cross contaminated with gluten.  If you are sensitive, definitely buy a designated Gluten Free rolled oat from a manufacturer like Bob's Red Mill

**all purpose flour for wheat-eaters

Peel and slice your apples.  The thinner you go, the better they cook.  Try to be even in your slicing.  
I only cook with granny smith, personally (some apples are for saucing, some are for eating, some are for baking, grannies are for baking).  Lay them out in a 9x13 (or dump 'em in and call it good).

Juice the lemon and pour over the top of your apples.

Sprinkle with 1/2 cup granulated sugar.


In another bowl, mix the oats, brown sugar, flour, nutmeg, and cinnamon.

Add the margarine/butter and mix quickly by hand or with a pastry cutter.  You will want a crumb texture where you can no longer see the white of the flour and no longer see the pats of butter.  

You can also do this in a cuisinart, on pulse.   

Sprinkle the crumb mixture on top.

Inhale.


Smells like fall.

Bake in a 375° oven for about a half hour, depending on how your apples were cut.


When it looks like this, it's finished.  See those toasty oats and crispy crumbly bits?  Yep.  We're there.


Apples are soft, but not mushy.  Crisp is crispy.  Corners are... wait... we need a better look:


Oh yeah.  That's the stuff. 

This counts as dinner, right?

Dairy Free, Gluten Free, Ooey Gooey Jack Skellington Cookie Cake

This isn't really a recipe as much as a method of decoration, but I'm putting it up for a friend.

I've just discovered Earth Balance Baking Sticks.  They're as awesome as my favorite earth balance, but they have a lower melting point (or some other scientific semantics that I won't bore you with).  Bottom line is - they make DELICIOUS cookies.  And dream cheese frosting (I totally just made that up.  It's vegan, made with tofutti "cream cheese.")

My oldest turned 14 last week and is a lover of all things cookie cake.  She asks for one every year, and it's something I'm always happy to do. (hey, no rolling out fondant or icing two dozen cupcakes?  I'm down!)

I set out to find some way to decorate her cookie cake so that it felt - festive.  I considered stacking, layering, icing in between, cookie sandwiches, decorating on top, you name it.  Ultimately, I decided to "decorate" with nondairy chocolate chips.

I made a double batch of my favorite cookie dough, sans chips.  Spread about a quarter of the batter into an 8" cake pan.  (It helps to have oiled or moistened hands, as is usually the case with gluten free batters/doughs)  Smooth it out.  Then press the chips in however your heart desires.  My heart desired Jack Skellington.  (the mouth got a little distorted as it rose in the pan, so you might want to not get so close to the edge).

The result?  Outstandingly delicious, ooey, gooey, soft, delicious mall-quality cookies.  I'm not kidding.  And not a bit of dairy or gluten.  You would never have known!


Ooey Gooey Cookie Cake

3 sticks Earth Balance Baking Sticks
1/4 cup Earth Balance 
(or four sticks of butter if you can do dairy)
4 eggs
1.5 cups brown sugar
1.5 cups granulated sugar
1 tsp salt
2 tsp baking soda
2 tsp vanilla
(or all purpose flour for you wheat-eaters)

2 bags of chocolate chips (whatever brand you like - we are using the Trader Joe's brand here)

Cream together the "butters" and the sugars.

Add eggs and vanilla.

Mix the dry ingredients, then add gradually until incorporated.

Remove 1/4 of the dough and press into an 8" cake pan 
(I used disposable here - oooh - livin' on the edge!) 

Press chocolate chips into the dough however you'd like.

Divide the rest of the dough into three more baking pans.  

Alternately, you can use a larger pan (like a 9X13) for the rest.  
I did three pans total and a sheet of cookie dough balls, which I froze to bake later on.  
The kids had them last night after dinner and they worked perfectly.

Bake at 375° for 20 minutes.  They will NOT look done when you take them out, but trust me.  
They'll be perfect once they cool.


Sunday, August 28, 2011

Bread and Butter Pickles Take Two

We had a great time eating the bread and butter pickles over the last two weeks.  So much so that they were gone in a matter of days.  When I found pickling cucumbers at the farm stand again, I couldn't resist their siren song.

However, this time I wanted to try something new.  The turmeric left stains on our counters and the refrigerated pickles at the grocery store aren't day-glo yellow.  So, here is our second attempt with a few adjustments.

5 pounds of cucumbers
2 large white onions
1 cup of kosher salt

Pickling liquid:
3 3/4 cups of white vinegar
3 cups apple cider vinegar
6 3/4 cups sugar
3TBSP mustard seeds
2 1/4 tsp celery seeds
3 cinnamon sticks
2 tsp whole allspice berries
2 tsp cloves

Slice the cucumbers and onions to desired thickness.

Coat liberally with salt (you're going to rinse this - don't panic).

Cover with a tea towel, then a layer of ice, before refrigerating overnight (at least 6 hours).

Rinse WELL with cold water.  Think you're done?  Rinse again with fresh water.  

Pack the cucumbers and onions into jars and set aside.

Place all pickling liquid ingredients in a heavy bottomed non-reactive saucepan (think stainless steel).

Bring to a simmer and stir until sugar is dissolved.  

Carefully ladle the hot pickling liquid over your cucumbers.  
(A canning funnel is worth the $3 investment, trust me)

Place the lids on and stick in the fridge for 3-4 days.


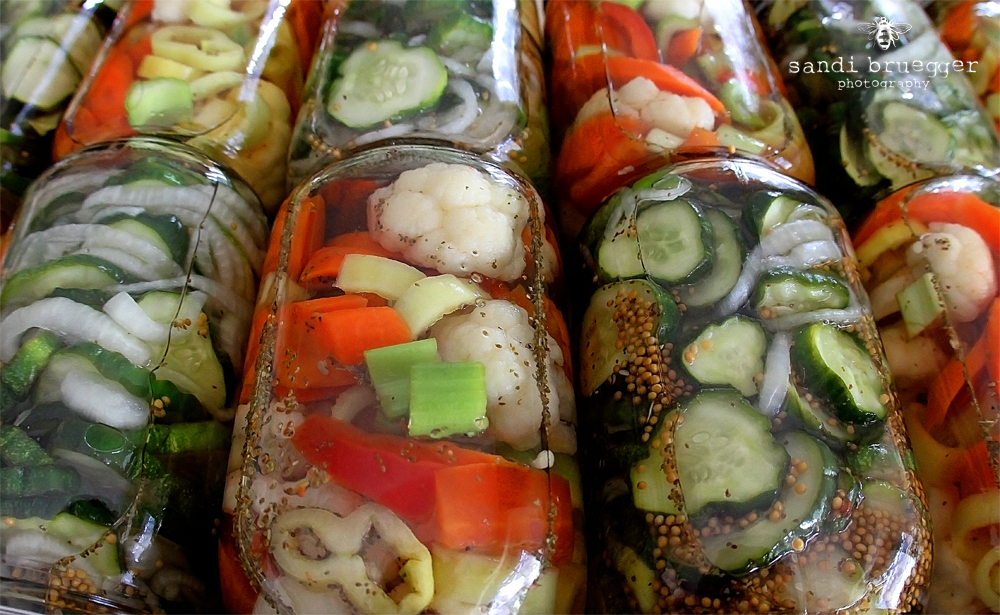
Yum! (And no yellow fingers!)

*note: the other jars are giardiniera / giardinera

Monday, August 22, 2011

Queen of Knots - Gluten Free Chewy Soft Pretzels

I have a confession...

More recipes are flops than successes.  A lot of them are edible, but don't make it to the blog because I'm also neurotic a bit of a perfectionist.  And, as the cliche says, we are our worst critics.  So, when my almond pound cake didn't work out quite as beautifully as I hoped, it ended up in bellies instead of blogs.

But, I have another confession.  When things work out... really, really work out?  I am downright giddy.

Today - it worked out. 

It really worked.

We've been planning a massive road trip.  For those of us who have to be conscious of allergens, that often means two things.  1: research.  research.  research.  2: planning, and packing, a ton of food.

Fortunately, we've found several restaurants that will meet our family's needs.  But, we will also be planning, and packing, many of our meals.  While brainstorming recently, my 7 year old asked if we could bring pretzels.  "Not the crunchy kind, mom.  You know, the smooooooshy soft kind with the salt on the outside?"

I told her I'd try.

Recipe development can be an expensive thing.  Gluten Free flours are not cheap.  But, through Amazon subscribe and save, I can get my favorite for about $10 a bag.  That's not bad.  

We received a shipment last week and I've gone through a bag and a half already.  (See aforementioned pound cake)  Today made it all worthwhile.

Queen of Knots Gluten Free Smoooooshy Soft Pretzels
for Piper

1 tsp kosher salt
2 packets of yeast
2 TBSP sugar
2/3 cup water
2 eggs
2 packets unflavored gelatin, softened in 1/2 cup of cold water

2 TBSP olive oil

2/3 c baking soda
10 cups of water

Mix 2/3 C water, both packages of yeast, and 2 TBSP sugar and set aside to proof.

Place the dough hook on your stand mixer (or a dough blade on a cuisinart).  

In the bowl, mix together flour, salt, gelatin, yeast, and eggs. 

"Knead" with the mixer until the dough is combined and smooth.

Take dough by the handful and smooth into a uniform ball.  Lightly dust the surface with flour and roll out into about a 10" length, half an inch around.  (Think play-doh snakes).

Twist the ends and press them back down in a pretzel shape or leave them as sticks.  (You can "glue" the ends down with a little beaten egg or water).  


 Lay the finished pretzels on a silpat (or parchment) lined sheet pan.  Once all the pretzels are formed, brush the surfaces with olive oil.  Cover with damp towel and let rise (approximately 30 minutes).

Preheat oven to 325°


Mix 10 cups of water with 2/3 cup baking soda and bring to a simmer.

Carefully drop each pretzel into the soda bath for a minute, turning halfway.


Remove to the lined baking sheet.  Complete until all are par-boiled.


Sprinkle with salt, sesame, or poppy seeds (I used kosher salt).

Bake for 12 minutes.  

Try not to burn your mouth!


**gluten adaptation for Brooke:
Substitute 3 cups all-purpose flour and omit gelatin/water mixture.  :)

TROUBLESHOOTING:

We re-made the recipe today and I decided to do a little troubleshooting, to see what could have gone wrong with Charlotte's batch.  Here is what I learned:

It is essential to add enough flour so that the dough is no longer sticky.  It's raining today, and it wasn't the first time, so humidity plays a role.  Additionally, you may need to add up to a cup to your dough to get it to a point where you can "snake" the dough.  A heavy dusting on the board/counter is important.

Also, when you first grab a handful of dough to form it into shape, press out any extra air.  The longer the dough sat, the more yeast reacted, the more airy it was.  This will make the pretzels fall apart as well.

In the soda bath stage, using a big spatula with holes or a spider (for frying foods) helps to flip them more gently without pulling.  They are very delicate, so be careful.  Something that keeps them flat is great.  That said, I did it today without flipping at all.  The soda bath bubbles up and over the pretzels and seems to work just fine.  30 seconds seems to work as well as one minute, so you can also cut the boil time.

After placing on the cookie sheet for baking, brush with an egg yolk, beaten with about a teaspoon of water.  Then add the salt.  This makes it brown beautifully.

I hope this helps!


Wednesday, August 17, 2011

Giant Gluten Free Chewy Oatmeal Raisin Cookies

1 Cup dates, pitted (fresh, not dried)
1/3 Cup water
1/2 cup Spectrum non-hydrogenated shortening or Earth Balance (or butter)
1 egg
1 1/2 cups brown sugar
2 tsp vanilla extract
2 cups flour
1 1/4 cups rolled oats (not instant)
2 tsp baking soda
3/4 tsp cinnamon
1 tsp salt
1/2 cup raisins
1/2 cup walnuts, blended in a food processor (or ninja) into a course meal

Puree dates and water in a food processor (I used my Ninja blender).  Scrape contents into a mixing bowl.  Add remaining ingredients and mix until flour is incorporated.

Form into patties by hand.  Place on a silpat (or parchment) lined baking sheet.

Preheat oven to 275°

Bake for 28-32 minutes.  (I put both sheets in the oven and rotated every 10 minutes for even distribution)


Monday, August 1, 2011

Bread & Butter Pickles

While at the farm last weekend, I spied some pickling cucumbers.  Believe me, the temptation of the premade bread and butter pickles was strong.  But, for $4.65 a jar, I instead opted for the cucumbers.

I've never made real pickles before.  Pickled beets?  Yes.  Refrigerator pickles?  Sure.  Marinated cucumber salad?  You betcha.  But, it can't be that hard, right?

Apparently it's a long process.  But, no, it isn't hard.

First, wash and slice your cucumbers and a large white onion.  I started with about 8 cups of sliced cucumbers.  I could tell you how many pounds or how many cucumbers, but they are so varied in size and weight it wouldn't be very helpful.  Don't worry, it's not an exact science.  You can have a little extra pickling liquid.

Toss them together in a big bowl and cover with a quarter cup of kosher salt.  Lay a towel over the top (you want a tea towel not terry cloth) or a cloth napkin.  Top with ice and place in the refrigerator for four hours.  Why?  Beats me, but I read it everywhere while researching, so I did it.


These sat overnight.  

Remove the ice and the towel, then drain the salt water.  I gave them a good rinse because I made the mistake of eating one like this.  


Make your pickling liquid.

2 Cups of Sugar
1 Cups of Apple Cider Vinegar
1 Cup of White Vinegar
2 TBSP mustard seeds 
1 1/2 tsp turmeric
2 tsp celery salt
1 cinnamon stick
10 cloves 

Bring the mixture to a simmer and stir until sugar is dissolved.

Place the cucumbers and onions in a jar (again, you can repurpose a jar for this - save a spaghetti sauce jar or one from artichoke hearts, like I do.  Since we're not actually canning it to be preserved, you just want something glass to let these sit in the fridge for a few days).

Ladle the hot liquid over the top until all the cucumbers are covered.

Place in the fridge for a few days.  Eat.  These last a while, too, because of the vinegar. 


I added some leftover beet juice to the center jar to see if we could get pink pickles.  I read a story about kool-aid pickles years ago and wanted to give it a try.  I'll let you know how that works out.