Monday, March 19, 2012

"Three Bite" Gluten-Free, Dairy-Free, Egg-Free Hot Cross Buns

I developed a gluten-free hot cross bun recipe some time ago.  But, as I mentioned in the last couple of posts, we've been going through some major dietary changes around here.  Dairy and egg are out!  Do not pass Go. Do not collect $200...

So, naturally, when the kids started asking for Hot Cross Buns, I knew I had my work cut out for me.  Developing the first required many, many, failures.  But, I hoped that I could figure it out.

Luckily, the first batch was a home run.
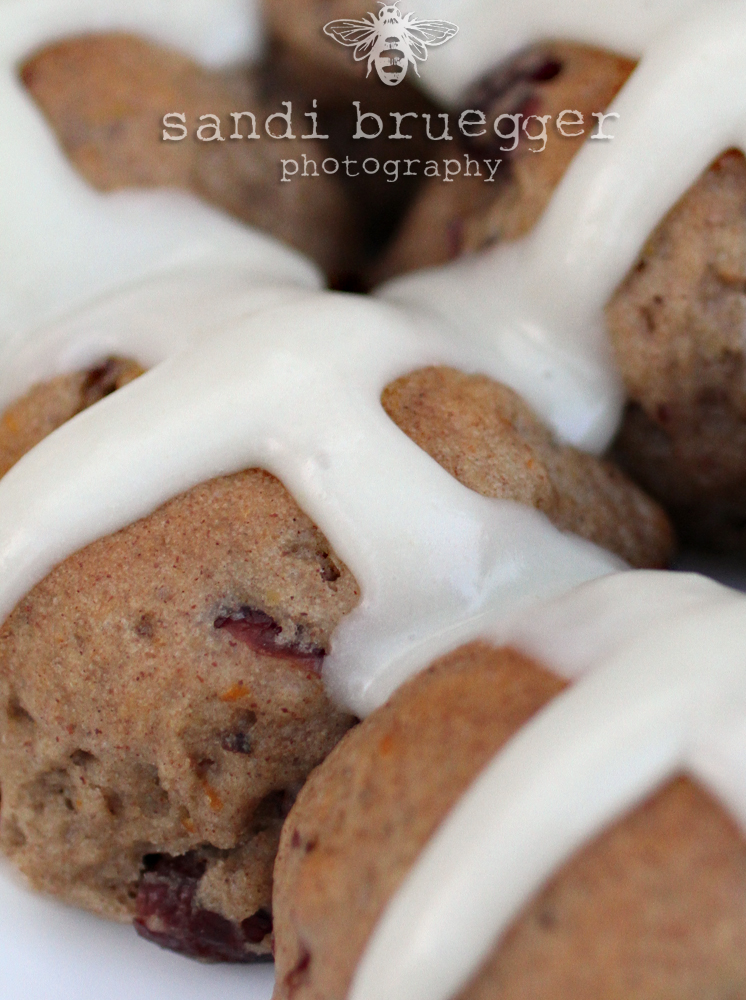

Moist.  Tender.  Not too dense.  Rich with spice.  Studded with fruit.  

Yep.  That'll do.

Caveat: what you think is a hot cross bun and what I have here may not be the same.  I apologize to the purists in advance.  However, if you just have to call this a spiced fruity sweet roll, that's okay with me.

 It's weird... but it's okay.  

I embrace weird.

I embody weird.


Hot Cross (spiced fruity) Buns

1 C non-dairy milk (I used almond, original)
1/2 C sugar
2 TBSP yeast

******

2 TBSP ground golden flax
1/4 cup water

(or two eggs, if you don't need this substitution)

*****

The zest of 2 oranges, plus the juice of one.
3 1/2 C Gluten Free APF (As usual, I used Pamela's
1/4 cup of applesauce or oil

2 TBSP cinnamon (preferred: Penzey's Vietnamese)
1tsp nutmeg (c'mon you can grind it!)
1/4 tsp ground cloves
1/4 tsp ground allspice

******

1 cup of craisins (or dried fruit of your liking) soaked in enough hot water to cover.

*****

Cream Cheese Icing*
(dairy free version below)


Microwave/warm the milk for about 45 seconds, or until it's no longer cold, but not too hot to touch.  
Think - baby bottle.

To the warm milk, add your yeast and sugar.  Set aside and let it do its frothy thing.

In a separate dish, mix together the flax and the water to create "flax eggs."  It's just a slurry, really.  But that will need to have a chance to set up, too.  Set that aside.

Out of counter space yet?  Hang in there.

Add the flour, zest, applesauce/oil, and spices to the bowl of a stand mixer.  

You'll want a paddle for this, not a dough hook.  Dough hooks are great for gluten-y bread, 
but not for this.  It will be like a thick muffin batter.

Pour the milk in, which should have a thick, foamy head by now.  Scoop your flax slurry into the bowl while you're at it.  

Turn it on.  Ease up to about medium speed and let it run until it's nice and airy.  
It takes about three minutes for this kind of dough.  
This is our "kneading" in the gluten free baking world.

Drain your dried fruit and toss that into the bowl when it's about finished.  
It can handle the beating, I promise.

Coat the inside of a bowl with baking spray or oil.  Scrap the dough out into the bowl, cover with a towel, and let rise in a warm place.  Mine took about an hour to fluff up.

It will be sticky, so you will need some tools of the trade.  As always, I use a sheet pan with a Silpat.  If you don't have a Silpat, a sheet of parchment will be fine.  If you don't have parchment, I think a stoneware pan would do.  If you don't have any of these... get creative!  I have faith in you.

Another helpful tool is a portion scoop.  You really can't roll gluten free dough by hand (if you can, it'll be tough and too dense in the end).  So, using something like this helps to keep it from getting everywhere.

Ready to roll? 

er... scoop?

On a silpat-lined baking sheet, scoop out mounds of dough.  I let mine touch each other on the edges because I love that little smooshy bit of dough where they fused together while baking.  

I'm not a fan of edges. 

My pan had 28 little dough balls.  Yours may have more or less, depending on the size of your scoop.

With wet hands, come back and smooth out the tops a little.  
You don't have to, but I wanted it to be pretty for you.

Brush the tops with your non-dairy milk of choice.

Now... here's another little trick I learned last year.  Take a 9x13 pan (like a brownie pan) and fill it halfway with water.  Place it on your bottom rack in the oven.

Then preheat the oven to 400°

Steamy.

It's kind of like a bain-marie, or a proofing box, for the dough.

Once the oven is pre-heated, slide the pan into the oven on the rack above the water.

Bake for 20 minutes or until golden brown on top.

While cooling, prep (or open!? Gasp!) your frosting.

Since cream cheese frosting has always been my favorite, I had to find some way to replicate it.

We've been playing with soaked raw cashews, a favorite of the raw food world.  And now I know why.

You can find raw cashews all over the internet, at your local Trader Joe's, or Whole Foods. 

For the best results, soak them in the fridge overnight.  I don't always have time, though, and I've gotten good results out of them unsoaked (just don't tell the raw foodies!).

Also, if you don't have access to the new So Delicious Greek Style Yogurt, I'm sorry.  If you have a coconut allergy like one of my friends, just go ahead and substitute any other vanilla yogurt you like.  
I recently found an almond one that was very good, too.

Dairy Free Cream Cheese Frosting
1 Cup of Raw Cashews (soaked, if possible, then drained)
The juice of one lemon (yep, juice a fresh one here.  You must.)
1 tsp gluten free vanilla

A bag of powdered sugar

In a high speed blender, puree the cashews with the yogurt, vanilla, and lemon juice until smooth.

From this point, you can switch to your stand mixer or do it by hand, with a whisk. 

Start adding powdered sugar until you get the right consistency for the job. 
 (I make it quite a bit thinner for a glaze, and much thicker to frost cupcakes.)

This time I needed about two cups.  If it looks too runny, add more.  Nothing scientific about this one.

If it gets too thick, a splash of almond milk will loosen it back up.

Easy.  I promise.


Have your hot cross buns all nice and cool now?

If you don't have a decorator gun, or a piping bag set, there's a quick solution.  Just grab a ziplock bag.  Any size will do.

Scoop about a cup of your frosting into the bag.  

Snip off the corner (start off very small - this will come out quickly - about the size of a drinking straw)

Pipe one line across the length of the whole pan, then one across the width.  Repeat until you have a cross pattern on each of them.  


Hope you enjoy!


Tuesday, March 6, 2012

Gluten-Free, Vegan Oatmeal Molasses Bread

The Cheesecake Factory's huge salads are a favorite in our family and the manager has always been happy to inform us of allergens.  However, it seems that the things we cannot have occasionally become the most enticing.  For my kids, this is the molasses oatmeal bread that arrives at the table.  I've made a few molasses quickbreads, but none were quite what they wanted.

This one, however, was great.  Nice crust.  Slightly sweet.  Rich with molasses, but not overpoweringly so.  

I have fantasies of making cashew cream cheese to smear on top, but that will have to wait.  A family favorite for the So Delicious Dairy-Free Recipe Contest


1 TBSP ground golden flax
1 tsp baking powder
1/2 tsp baking soda
1/4 cup gluten free rolled oats + 1 TBSP for the top

1 cup so delicious almond milk
1 TBSP apple cider vinegar
2 TBSP blackstrap molasses
1 TBSP maple syrup


As is the case with most quickbreads, this is a measure + mix recipe.

Blend until smooth.  The end.

Divide the dough into thirds and place on a silpat-lined sheet pan.

It will be sticky, sticky, sticky.  That's okay.  It's just how gluten free bread rolls. 

Get it?  Bread...Rolls.

Wow I've been inhaling too much flax today, I think.

Wetting your hands before shaping helps it to not stick as much and you can smooth out the edges better.  If you want to get fancy, you can slit three times across the top, but I'm not going to judge.

Sprinkle the top with the reserved oats and bake at 400° for about 25 minutes.

(if you make a single loaf, it's going to take longer, naturally)

Happy eating!

Saturday, December 24, 2011

Gluten Free, Dairy Free Eggnog Do(ugh)nuts.

Whether you spell them donut or doughnut, they're delicious!


After making the Apple Cider Donuts this Halloween, I had little people requesting something special for the holidays.  This time I set out to make an eggnog based donut, modifying the original cider recipe just a tad.  Here's what we came up with:


1/4 cup of soy-free earth balance (or butter-ish substance of your choosing)
1 cup of sugar
2 eggs
1 1/2 cups So Delicious Coconut Nog (or eggnog of choice)

4 cups Pamela's Gluten Free Bread Mix/Flour (plus enough for dusting)
2 tsp baking powder
1 tsp baking soda
1/2 tsp fresh grated nutmeg (or 1 tsp of the pre-ground stuff)

Mix it all up.  

Dough will be incredibly sticky, just hang in there.

Scrape it out onto a well-floured surface.  I actually use a layer of flour on my silpat for extra protection.

Dust with yet another layer of flour and roll until about a half inch thick.

Cut out into desired shape (we use a circle cutter and a piping gun tip for the centers).

Lay out the donuts on a silpat-lined sheet pan and refrigerate for at least a half hour.

I use a large, heavy-bottomed saute pan by Cuisinart for my frying.   It takes about an inch of neutral oil.

Heat to around 350° - you can always toss a donut hole in there and when it floats right back up to the top, sizzling at the edge, the oil is ready.

They go QUICKLY so make sure you have a landing pad ready.  I use a cooling rack over a layer of paper towels on my sheet pan.

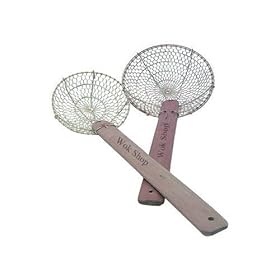
A spider like this is what I use for fishing mine back out.

They should only take a few minutes per side.  Don't be worried if they look flat, like a big washer, when they're raw.  They puff like mad in that oil!

Let cool a bit, then roll in powdered sugar or glaze them to your heart's desire.

My glaze consists of: 
2 cups powdered sugar
1/2 tsp vanilla
1/4 tsp fresh nutmeg
1 tsp light corn syrup
warm water to make a pourable fondant consistency
then thin with extra nog, if need be, for dipping consistency


Happy Holidays!

Wednesday, December 21, 2011

Gluten Free Gingerbread (for houses and men!)

A few weeks ago, my 11 year old mentioned that she'd never had a gingerbread man.  Around the same time, my 7 year old asked if we could make a gingerbread house - a task I'd never completed successfully.

Sure, we've bought the kits.  And failed at them.  Roofs collapsed.  Tears ensued (and the kids were bummed, too).  So, my nerves were fried as I set out to make (of all things) a gingerbread house that was gluten free!

I mean, come on.  Gluten free baking can be tricky.  Mistakes are expensive.  I couldn't even assemble graham cracker houses, what on earth made me think I was capable of gluten free, homemade, gingerbread!?  From scratch?!

My friends were pretty convinced I had lost my mind.  "Buy the kit, just let them decorate it."  "Make a gluten-free door and they can eat that part."  

cross contamination.  contact ingestion.  but... but... they can't EAT that!

So, I watched videos.  I read blogs.  I scoured pinterest. 

Then I mustered up the courage, took a deep breath, and tried it.

They came out of the oven fragile.  I slid the silpat onto a cooling rack without breathing, silently invoking all the holiest members of the holidays I could think of.  Dear Frosty... Please Rudolph... Oh, Santa... 

And guess what?

It worked!

They firmed up so beautifully.  We made royal icing.  It worked.  It all was going so smoothly.

Until I got cocky.  

I made one crucial mistake.  I didn't let the construction royal icing set up entirely.  Introducing the runnier color flow type royal icing into the equation caused a major structural issue.  Luckily one of the kids spotted our sliding roof top and we were able to salvage it.  

Note:  Typically, on my blog, I avoid all things with artificial food coloring.  Because of this, I went with Necco wafers for shingles.  Well, guess who changed their formula within the last month?  Yup.  So these ARE artificially colored - but who eats those nasty little flat antacid things anyway? :)

Without further ado...  the gingerbread!

1 1/2 cups of molasses
2 eggs
1/2 cup of Spectrum non-hydrogenated shortening
1 cup brown sugar

1/2 tsp baking powder
1 tsp baking soda
4 tsp cinnamon
4 tsp ground ginger
1 tsp salt

Cinnamon or flour for dusting your rolling pin and counter top

Cream together the molasses, eggs, shortening, and brown sugar until smooth.  It took a little bit for my paddle to break down the shortening, but it's important.  The good thing is, you can see when it's worked in evenly due to the dark molasses color.

Combine the dry ingredients and add a couple cups at a time, working slowly.  This will be a SERIOUSLY thick dough.  Mix until all the white is gone and the dough is sticky and uniform.

Remove the dough from the ball, pressing out as much of the air as you can. 
Pat into a slab, wrap in saran wrap, and refrigerate for at least an hour.

***

While that rests, print out your template.  You can use whatever you'd like.  
Note: the roof should be 2 pieces of 6 1/2 x 7 1/2 pieces.  You have to measure those. 
She didn't include that in the template. 

Preheat the oven to 350°

Dust your surface and rolling pin with cinnamon (or flour).

Roll to about 1/4" thickness.

With a board scraper (which I used) or a knife, cut out the shape of your house.

Transfer the pieces (you should have six) to a silpat (or parchment) lined sheet pan.

Bake for 25 minutes.

VERY carefully remove them from the oven, leaving them to cool on the baking sheet if possible.

Cool several hours until hard to the touch.

With the remaining dough, roll out again and cut out gingerbread men or other shapes.  This recipe yielded one Martha-sized house, 7 large gingerbread men, and 42 tiny gingerbread hearts (two of which I cut out of the peaked sides of the Martha house as a little window).

***

To assemble:

Make a batch of royal icing according to label directions.  
I used the Wilton meringue powder and their icing recipe enclosed in the lid.

Fill a piping gun or pastry bag with the thick icing.

Lay down a 1/2" or so of the icing on your assembly surface as your foundation.
(I wrapped a piece of cardboard in freezer paper here, but you can use a cake board, available at Walmart and craft stores).

Working slowly, assemble the four walls of your house with a thick layer of royal icing.

LET.  IT.  DRY. 

Trust me.

The roof was a little trickier, because it has to lay across the top peaks.  With a thick layer of icing on all connecting surfaces, I laid one peak on at a time, placing additional icing to the backside of the roof where possible.  Let it dry.  Did I say that?  Do it.  Seriously.

Also, royal icing dries hard, so don't leave it sitting out.  Put a wet towel over it or keep it in a container.

Once the house's structure is built, let it dry.  Again.  I know.  But do it.

We let it sit overnight.

With a thinner recipe of royal icing, you can go back in and glue your decorations.  I recommend a wilton squeeze bottle for this. I think they were $2 at Michael's 
and they have a cap so your icing doesn't dry out between sections.

Try something you've never dared before this holiday season!  You may be pleasantly surprised with the results.  And don't forget to invoke Frosty!


Wednesday, November 23, 2011

Cranberry Apple Chutney

Do you remember last year's post about this burst of fall flavor?

Cranberry Apple Chutney has to be one of my all-time favorite condiments.  It is Exhibit A for gluten-free, dairy-free, vegan food being utterly delicious.  And while you can put it on just about anything, it really shines on turkey.  Okay, I realize that completely contradicts that whole vegan thing, but hey - you can put it on tofurkey, too, right?

The house smells like bright, sunshiny fall, heavy with spice.  So, I thought I'd take this opportunity to re-blog the recipe for you all and show you the adorable spoons my friend makes.  She's one of those uber-crafty types and, let me tell you, you want to grab these while you can.  After recent media attention, and celebrity party planners scooping them up, they're hot! hot! hot!

I'm a tad obsessed with them and have a few projects planned over the next few weeks.  I can't wait to share them with you all.  She can put darn near anything on a spoon, but her in stock designs are to-die-for cute.  Knowing I am enamored with all things Alice, she sent me a nice set:


3 cups of fresh cranberries
3 cups of peeled, diced apples (I used honeycrisps and granny smith that were too bruised for my kids to possibly eat)
1 cups of sugar
1 1/3 cups of apple cider vinegar
1/2 tsp allspice
1/2 tsp good cinnamon (I like Penzey's vietnamese)
1/2 tsp ground ginger (dried stuff is fine)
1/4 tsp ground cloves
1/4 tsp fresh grated nutmeg (please)

Dump it all in a heavy bottomed stainless steel pot.  (The BEST stock pot ever - not too big, not too small, steams veggies, drains pasta, all in all great pot.  I've had it for years and we use it 3-5 times a week.)

This isn't a baking recipe, order doesn't really matter.

Stir occasionally to make sure the sugar is getting mixed in and not burning on the bottom of your pan.  Also, I realized that cranberries are loaded with pectin, the stuff that makes jelly and jam stick together.  As they burst, they will sort of fall to the bottom and can get goopy down there.  Don't worry if that happens, it mixes right back in.  (not that I know from experience or anything)

This needs to simmer for about 25 minutes.  It will thicken, reduce, and all the cranberries will pop.  You can encourage them by smooshing them against the side of the pot.  Your house will smell like heavenly fall goodness at this point (and yes, the vinegar smells STRONG in the beginning, but trust me. It's right.  And it mellows out.)

When it's done, it will be thick, almost the consistency of applesauce.
See how thick it is here?


And, of course, it makes a ton and would be an awesome hostess gift.  Here's an itty bitty "ice cream spoon" from Sucre and Spice tied on a tiny jar for gifting:


Happy Eating!

Friday, October 28, 2011

Gluten-Free, Dairy-Free Apple Cider Donuts (doughnuts? deaux knuts?)

Any way you spell it, apple cider donuts are a delicious part of fall.  The local apple orchards have a corner spot at the farmer's market where they sell everything from strawberry-rhubarb pie to slushy cider.  While pregnant (many, many years ago) I happened upon a small package of apple cider donuts at the stand and couldn't resist.

The cinnamon sugar melted against my tongue as I bit into the crisp exterior.  The inside was reminiscent of an old fashioned buttermilk donut with the faintest hint of apple-y goodness.

That was the beginning of a love affair with cider donuts.

Fast forward to this fall.  At the point that my beloved donuts were available, I had realized my sensitivity to dairy was pretty severe.  I knew I would have to end things, but my heart would pang as we drove near the market.  Something had to be done.

Today, I think I have not only replicated the recipe - I may have even improved it.

The kids occasionally ask for the frozen gluten-free donuts at the grocery store, but they're a tad expensive and a tad... not great.

After my first batch of donuts, I can safely say that I will never, ever buy them again!  They were remarkably easy and taste amazing warm.  I think you'll find that it's worth the bit of effort involved in making them from scratch.


Gluten-Free, Dairy-Free Apple Cider Donuts 
(pictured with maple glaze)

1 cup apple cider* 
1 cinnamon stick
a few grates of fresh nutmeg

(*Sam's has honeycrisp cider - which, of course, is what I used!)

***

1/4 cup of soy-free earth balance
1 cup sugar
2 eggs
1 TBSP apple cider vinegar
 1 cup original almond milk

***

4 cups Pamela's Gluten-Free Bread Mix / Flour (plus enough for dusting)
2 tsp baking powder
1 tsp baking soda
1/4 tsp salt
1 tsp cinnamon
dash of ground allspice
dash of ground cloves
a few grates of fresh nutmeg

***

neutral oil for frying

Topping options:
cinnamon sugar
powdered sugar
maple glaze 


Simmer the apple cider and spices until reduced by half.  Your house will smell amazing now.  
You're welcome.

Mix together all the dry ingredients and set aside.

In a mixer, cream together the earth balance and sugar, then add eggs.

Slowly pour in the reduced spiced cider, apple cider vinegar, and almond milk.

Add a the dry ingredients about a cup at a time until incorporated.


The final batter will be very sticky.  
A silpat-lined baking sheet dusted with flour will make your life easier.

Pat or roll out the dough to about a 3/4" thickness.

Allow the dough to rest in the refrigerator, if possible, for a half hour.

Cut to desired shape, roll, cut, roll, cut until all the bits and pieces are used.


Bring an inch of oil in a heavy-bottomed pan up to about 350°
(that candy thermometer helps here)

Carefully lower 4-5 donuts into the hot oil, flipping once they are GBD*
*golden brown delicious ™Alton Brown

Remove to a cooling rack and let cool until you can handle them.

Top any way your heart desires.  I made a mixture of cinnamon, sugar, nutmeg, cloves, and allspice since I had them out from the recipe.  We rolled donut holes in that and they were delicious.  

But, when I think of donuts - and I mean good donuts - I think maple bars.  They're not popular in my area, and I didn't even taste a maple bar until well into my twenties.  
But, they are, in my opinion, the best donut on earth.  

And what could be more delicious than apples and maple together?  bacon and maple

Maybe next time.

I threw together a quick maple glaze for the rest. 
2 cups powdered sugar
1 tsp karo light syrup
1 tsp maple extract
1/2 tsp vanilla

Add enough hot water to reach a pourable fondant consistency and you're done.

Whisk to be sure you have all those lumps out!

Dip.  Drizzle.  Devour


Gluten-Free, Dairy-Free Caramel Dip for Your Apples!

Remember how I waxed poetic about the lusciousness of Bourbon Caramel Apple Dip?

That's because I have a confession...

I don't like chocolate.  I can totally live without it.  I could go every day for the rest of my years on this planet without ever having it on my tongue again.

But caramel?

Buttery, gooey, rich, softening against the tongue caramel?  Be.  Still.  My.  Heart.

Add fleur de sel and I'm done.  Done.  There is nothing better.

So, when I realized that the source of my (five years worth of!) abdominal pain may be related to dairy, my heart cracked a little at the thought of never having the amber nectar of the gods again.

Now, let me tell you - this was no small feat.  I'm a caramel snob.  Melted waxy squares from a bag will not do.  It has to be right.

I adapted my recipe and found it opaque and creamy with a slightly coconutty taste.  Bad?  Not really.  But it wasn't perfect caramel.

So, I tried another recipe from another blogger.  Utter and complete fail.  It was gritty, separated, and runny.  That one ended up in the trash after cooling in the fridge overnight and yielding nothing worth salvaging.

This morning, I decided it was worth it to try one last time.  I could have used the creamy caramel above for the kids' apple dip, but really?  I would have been disappointed in me.  I don't do disappointment well.

I came back to my original recipe with a little tweak and VOILA!  It's perfect!

Thick.  Gooey.  Luscious.  Buttery.  Tasting of burnt sugar and creme brulee and vanilla and delicious.


May this bring back your faith in dairy-free cooking and put a smile on your face:

1 Cup Soy-Free Earth Balance 
2 1/4 cups brown sugar, packed
2 1/4 cups granulated sugar
1 1/2 cups karo light syrup
(you may be able to sub agave, if you're avoiding corn.  I haven't tested it, but I don't see why not.)

***

2 cups of original almond milk

***

2 tsp high quality gluten-free vanilla

(I skipped the booze - for shame - but you're welcome to drop that to 1 tsp of vanilla 
and add 2 tbsp of maker's mark or knob creek, should your boozy heart desire)

***
In a small pot, pour the almond milk and bring to a simmer, 
allowing it to thicken and reduce while the sugar cooks.
(There's no magic timeline for this, just let it bubble away)


In a large, heavy-bottomed, non-reactive pan (think stainless steel stock pot) 
combine the first four ingredients, stirring regularly as the butter melts.
Insert a candy thermometer.

Continue to stir as it comes up to temperature.  
Sugar will burn, and not in a yummy caramel-y way, so don't walk away.  

Safety note: boiling sugar will burn you in ways you can't even imagine.  This isn't one for the kids, folks.  Stay safe and make sure you use a long-handled silicone spoonula.

When the sugar mixture comes up to 230°, add the vanilla (and bourbon, if desired)... slowly!
It will cause the sugar to expand, so be particularly careful during the next two steps.

Pour your reduced almond milk into the bubbling caramel... did I mention to do this slowly?  

Bring the entire mix up to 240°

Ladle into clean jars and set on the counter to cool, then refrigerate.